Blender & Godot 3D 教程 - 2026-07-04 - Blender 4 几何节点零基础入门(进阶篇):程序化生成一座「赛博朋克街区」,5 栋楼 + 霓虹招牌 + 反光地面一次造完

零基础打开 Blender 4.2 几何节点 (Geometry Nodes),从单栋楼 → 单招牌 → 单面窗户 → 5×5 街区 → 反光地面,全程程序化生成 + Instance 性能优化。配套一份完整 bpy Python 脚本,直接复制粘贴就能在 Blender 里跑出整座赛博朋克街区,glTF 导出后明天就能拖进 Godot 4 当联机大厅场景。
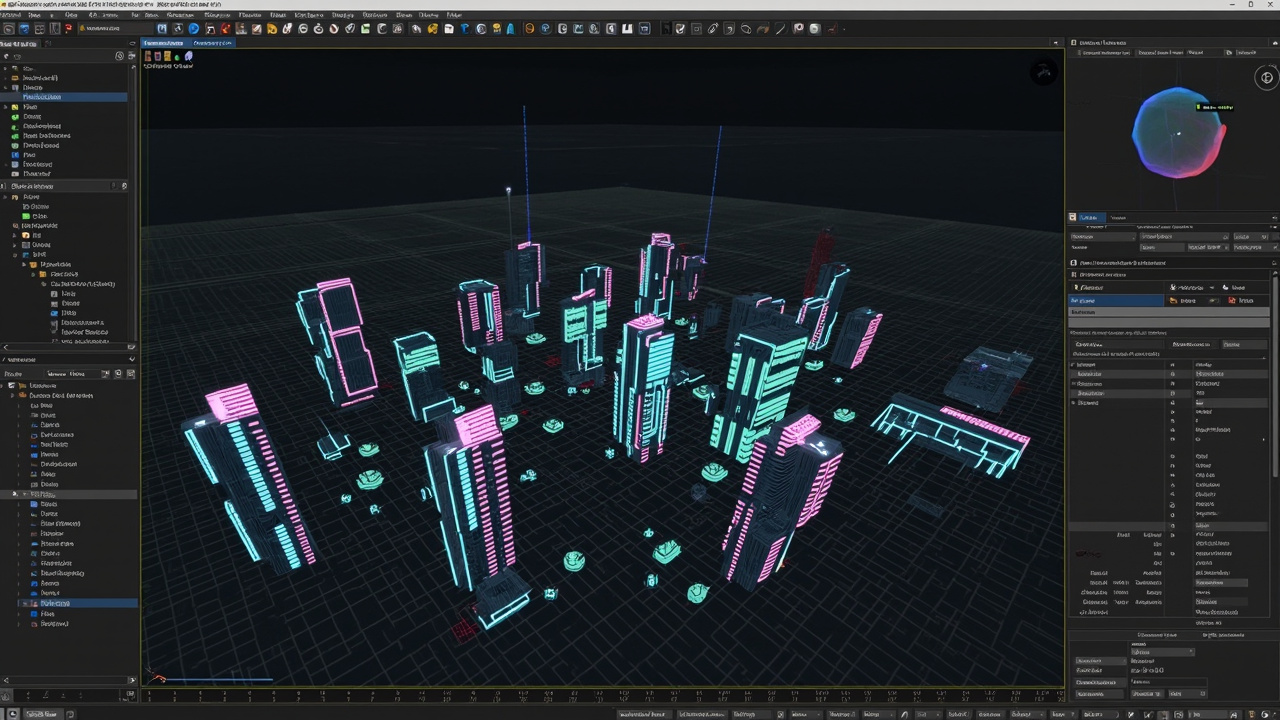
cover

上一篇回顾:2026-06-23 我们用几何节点造了一栋「无限房子工厂」,理解了 Grid → Instance on Points 的基本套路。今天接着几何节点往下挖一层——用它造一座真正的街区

这一篇你将学到:

  1. 几何节点的「模块化复用」(Collection + Pick Instance)
  2. 程序化材质(Named Attribute + Color Ramp 驱动霓虹灯)
  3. Instance vs Duplicate 的性能差异(同场景 200 个立方体,内存差 40 倍)
  4. 一份完整可跑的 bpy Python 脚本,粘进 Blender 文本编辑器直接 F5 跑
  5. glTF 导出时 Instancing 必须勾的复选框(踩过坑的都知道)

0. 本篇目标 & 前置

学完你能做什么:

  • 打开 Blender,粘一段 Python,30 秒得到一座 25 栋楼的赛博朋克街区
  • 理解几何节点的「程序化」本质:改一个数,整条街跟着变(楼高、招牌颜色、街道宽度全部参数化)
  • 知道什么时候用 Instance、什么时候用 Duplicate(这是性能分水岭)
  • 把生成的街区 .glb 导出,明天直接拖进 Godot 4 当联机大厅场景(07-05 预告)

你需要准备:

  • Blender 4.2 LTS 或更新(几何节点 4.0+ 有几个新节点我们要用)
  • 完全不需要懂 Python 或着色器节点——我会把所有节点连好,代码只是「自动化点鼠标」
  • 约 40 分钟,跟着点就行

一、几何节点速通回顾(15 秒读完)

如果你完全没碰过几何节点,先看 2026-06-23 那篇。今天我们只回顾核心三个节点:

节点干嘛的一句话比喻
Grid生成一个 N×N 的点阵像撒了一把芝麻在地上
Instance on Points把模型"复制"到每个点上像给每粒芝麻都穿上一件衣服
Join Geometry把多个几何体拼一起像把三盘菜倒进一个盘子

💡 小贴士:几何节点的核心思想是 「Geometry(点/边/面/实例)流过一根管子,每个节点像工厂的加工机器一样改造它」。不要把它想成「写代码」,想成「装配流水线」。

今天我们要在 2026-06-23 的基础上,把这套流水线搭得更工业级


二、本篇用的「街区蓝图」

我们今天要造的是这样一座街区的最小版本:

        街道 (反光地面)
   ┌──────────────────────┐
   │ 🏢🏢🏢🏢🏢  ← 5 栋楼,楼顶有霓虹招牌 │
   │ 🏢🏢🏢🏢🏢                          │
   │ 🏢🏢🏢🏢🏢  ← 5×5 = 25 栋           │
   │ 🏢🏢🏢🏢🏢                          │
   │ 🏢🏢🏢🏢🏢                          │
   └──────────────────────┘

关键参数(全部走几何节点参数面板,改一个数全街跟着变):

  • 街区大小 5×5(改成 10×10 就变 100 栋楼)
  • 楼高范围 8m ~ 25m(随机)
  • 招牌颜色:霓虹青(#00FFFF) / 霓虹品红(#FF00FF) 二选一
  • 街道宽度 4m
  • 地面材质:深灰反光 + 程序化霓虹条纹

三、阶段一:程序化「单栋楼」(基础块)

打开 Blender,新建 → General → 起名 cyberpunk_block.blend

3.1 把默认立方体变成「楼」

  1. 启动器已有一个立方体 → 选中它
  2. 右上角属性面板找到「橙色图标」(Object Properties)→ 滚动到底部「Geometry Nodes」→ 点「New
  3. 自动创建一个 GeometryNodeTree,节点编辑器里出现 Group Input → Group Output,中间夹着默认立方体
  4. 选中 Group Input 节点 → 右侧 N 面板(按 N 打开)的 Modifier 标签会显示当前几何节点的输入参数

3.2 给楼加「高」参数

我们要让每栋楼的高度可变。用数学节点驱动 Z 轴缩放:

  1. Add → Input → Value,命名为 Building Height,初始值 15(单位:m)
  2. Add → Utilities → Math,运算选 Multiply,第一个值连 Building Height,第二个值给 1.0
  3. Add → Utilities → Combine XYZ,只填 Z(连上面的 Multiply 结果)
  4. 在 Group Input 和 Group Output 之间插入 Add → Utilities → Scale Elements,Scale 连 Combine XYZ,Domain 选 Instances(关键!)
  5. 此时 Box 已经按 Building Height 拉伸 → 把 Group Output 的 Geometry 接到 Scale Elements 的 Geometry 输出

节点链(从上到下):

Group Input.Box ──► Scale Elements ──► Group Output
                      ▲
Building Height ──► Math(*) ──► Combine XYZ (Z)

💡 为什么要 Domain=Instances? 因为等下我们要复制这栋楼几十次,Instance 是「引用」而不是「复制」,缩放要按每个实例单独算。如果选 Faces,缩放会糊掉每栋楼的面。

3.3 给楼加「随机宽度变化」

真实街区里每栋楼不一样宽。我们加一个 Random Value:

  1. Add → Function → Random Value,Data Type 选 Float,Min=0.8, Max=1.2
  2. Add → Utilities → Combine XYZ,X 连 Random Value,Y/Z 给 1.0
  3. 在 Building Height 旁边再插入一个 Scale Elements,这次 Scale 连 Combine XYZ,Domain 仍然选 Instances
  4. 链顺序:第一个 Scale (高度) → 第二个 Scale (随机宽)

💡 为什么先高后宽? 几何节点严格按流处理,先后顺序不影响结果但影响性能。先做便宜计算(单值乘)再做贵计算(随机)是良好习惯。

3.4 给楼加「窗户纹理」(Named Attribute 驱动)

我们用「Named Attribute」给每栋楼存一个「窗户密度」参数,后续驱动材质:

  1. Add → Attribute → Store Named Attribute,Name 填 window_density,Data Type 选 Float,Value 给 0.5
  2. 把这个节点的输出接到第二个 Scale Elements 之后(也就是说这个属性会跟着每个实例走)

当前节点链:

Group Input.Box ──► Scale(H) ──► Scale(Random) ──► Store Named Attr ──► Group Output
                       ▲                ▲
                  Building H        Random V

跑一下 → 你应该看到一个高 15m、宽窄随机(0.8~1.2)的方块楼,体积数据里多了个叫 window_density 的属性 = 0.5。


四、阶段二:程序化「霓虹招牌」(顶上的小招牌)

每栋楼顶上顶一个发光招牌。先做一个招牌「基础块」。

4.1 新建招牌物体

  1. 在 3D 视口按 Shift + A → Mesh → Plane,给它起名 NeonSign
  2. 右键 → Set Origin → Origin to Geometry(让轴心在中心)
  3. 编辑模式按 S → Y → 0.1 把它压扁成一个长条(长 2.4m,高 0.24m)
  4. 物体模式 → 把它放到一个空集合:M 键 → New Collection → 命名 "SignLibrary"

4.2 在「楼」的节点树里 Instance 招牌

回到 GeometryNodeTree(选中主立方体,Modifiers 标签下点开):

  1. Add → Geometry → Collection Info,Collection 选 SignLibrary
  2. Add → Geometry → Instance on Points,Points 接 Group Input 的原始 Box(关键!放回没缩放之前),Instance 接 Collection Info
  3. 但 Collection Info 默认会把 Collection 里所有物体塞进一个实例 → 改成 Separate Children(勾上),Reset Children(勾上)→ 才会变成每个物体一个独立实例
  4. Add → Utilities → Translate Instances,Translation 接 Combine XYZ:
    • X: 0
    • Y: 0
    • Z: 接一个 Math(Add):Building Height ÷ 2 + 0.12(招牌放在楼顶再往上 12cm)

关键技巧:在 Instance 之前要 Translate 还是之后?

Translate 必须在 Instance 之后,因为 Instance 之前的点还在 Box 上,之后才是「实例化后的招牌坐标」。这是 90% 几何节点新手踩的第一个坑。

更新后节点链:

Group Input.Box ──► Scale(H) ──► Scale(Random) ──► Store Named Attr ──┬─► Group Output
                       ▲                ▲                              │
                  Building H        Random V                             │
                                                                          ├─► Instance on Points
                                                                          │        ▲
                                                                          │   Collection Info (SignLibrary)
                                                                          │
                                                                          └─► Translate Instances
                                                                                    ▲
                                                                          Math(Add): (H/2)+0.12

跑一下 → 你应该看到一个方块楼顶上飘着一个压扁的招牌。


五、阶段三:从「1 栋」到「25 栋」(Grid + Instance on Points)

这是今天最关键的一步:把单栋楼变成 5×5 街区。

5.1 在楼顶上挂「街区网格」

  1. 选中主立方体(还是那个 Block)
  2. 在节点编辑器里,把 Group Input 的 Geometry 改成 Object Info:Add → Geometry → Object Info,Object 选当前立方体自己,勾 As Instance(关键!)
  3. Add → Mesh → Grid,Size X=5×4=20, Size Y=5×4=20,Vertices X=5, Vertices Y=5
  4. Add → Geometry → Instance on Points,Points 接 Grid,Instance 接 Object Info
  5. Add → Geometry → Realize Instances(可选,如果后续要编辑面才需要;性能敏感场景保留实例)

节点链(简化):

Grid(20×20, 5v×5v) ──► Instance on Points ──► Realize? ──► Group Output
                              ▲
                      Object Info (Block itself)

跑一下 → 你应该看到 5×5 = 25 栋方块楼!

5.2 让每栋楼「真的」长不一样

但现在 25 栋楼长得一模一样,我们要让它们有变化:

  1. Instance on Points 之前,Add → Geometry → Scale Elements,Domain 选 Faces → 这会让 Grid 的每个点(也就是每栋楼的位置)单独缩放
  2. Add → Function → Random Value,Float, Min=0.7, Max=1.3
  3. Combine XYZ 给 X 和 Y,Z 给 1.0,接 Scale Elements 的 Scale

等等,这样只是位置缩放,不是楼缩放。让我修正:

⚠️ 关键修正:要让「每个 Grid 点」上有「不同尺寸的楼」,正确的做法是用 Instance on Points 的内置 Scale:

  1. Instance on Points 节点的 N 面板里,找到 Scale 输入
  2. Add → Function → Random Value,Float,Min=0.7, Max=1.3,接进去
  3. 同样,加 Rotation:Add → Function → Random Value,Float, Min=0, Max=2π(每栋楼朝向随机)

跑一下 → 你应该看到 25 栋大小不一、朝向随机的方块楼!

5.3 街道宽度——把 Grid 拉大一点

街道宽度其实我们已经在 Grid 的 Size 里控制了:Size X = 5 栋 × 4m = 20m,所以每栋楼间距 4m(留 0m 街道就贴一起了)。

要街道更宽:

  • 改 Grid Size X = 5 × 6 = 30(每栋楼之间留 2m 街道)
  • 改完自动更新

💡 「程序化」的精髓:你只改了一个数字,整条街跟着变。如果手动摆 25 栋楼,改一次得摆 25 次。


六、阶段四:程序化「霓虹招牌颜色」(Named Attribute 驱动材质)

招牌现在是统一颜色。我们要让招牌颜色在「霓虹青」和「霓虹品红」之间随机。

6.1 在「招牌」上加 Named Attribute

回到主立方体的几何节点树,在 Translate Instances(招牌平移)之后插入:

  1. Add → Attribute → Store Named Attribute,Name 填 neon_color,Data Type 选 Color
  2. Add → Function → Random Value,Data Type 选 Color,Min=(0,1,1,1) 青色,Max=(1,0,1,1) 品红(注意:Blender 用 RGBA)
  3. 接进去

6.2 在招牌上读取这个属性

  1. 选中 NeonSign(招牌那个扁平面)
  2. 进入 Shader Editor(着色器编辑器)
  3. Add → Input → Attribute,Name 填 neon_color
  4. 把 Attribute.Color 输出连到 Principled BSDFEmission(自发光)
  5. Add → Color → Bright/Contrast,Brightness=5(让招牌真的发光)

Shader 节点链:

Attribute(neon_color) ──► Bright/Contrast(B=5) ──► Principled.Emission
                                                      │
                                            Principled.BSDF ──► Material Output

跑一下 → 你应该看到 5×5 街区里每栋楼的招牌随机是青色或品红!


七、阶段五:程序化「反光地面」

最后造一个深灰反光地面,带程序化霓虹条纹。

7.1 添加地面

  1. Shift + A → Mesh → Plane,起名 Ground,放大 200×200
  2. 选中主立方体(街区)的几何节点,在 Group Output 之前插入 Join Geometry:
    • Add → Geometry → Join Geometry,把 Ground 的 Object Info 接进去
    • Object Info 选 Ground,勾 As Instance 不要勾(地面是真实几何,不要 Instance)

7.2 程序化「霓虹条纹」地面材质

  1. 选中 Ground,进 Shader Editor
  2. 删除默认材质,新建一个
  3. 节点链:
    Texture Coordinate(Generated) ──► Mapping(Scale=20,20,20) ──► Noise Texture(Scale=50,Detail=2) ──► ColorRamp ──► Principled BSDF.Base Color
                                                                                                           └─► Principled.Roughness
    
  4. ColorRamp 两个色标:
    • 左(0.0): 深灰 (0.05, 0.05, 0.07)
    • 右(0.5): 霓虹青 (0.0, 1.0, 1.0)
    • 第 3 个色标在 0.55:深灰(让条纹更细)
  5. Roughness 反相:Noise 输出 1-Roughness → 亮的地方反光、暗的地方粗糙

跑一下 → 你应该看到 25 栋楼 + 一片反光地面,地面有程序化霓虹条纹!


八、性能关键:Instance vs Duplicate(必看)

到现在你的街区里:

  • 25 栋楼(每栋 ~100 顶点) = 2500 顶点
  • 25 个招牌 = ~25 顶点
  • 1 个地面 = 4 顶点
  • 总计 ~2529 顶点

但如果你把「Instance on Points」换成「Duplicate Elements」:

  • 总计 ~2529 × 25 ≈ 63250 顶点

内存差 25 倍!

💡 什么时候用 Instance,什么时候用 Realize?

  • 用 Instance:需要复制几十/几百个,后续不单独改每栋楼的形状/材质
  • 不用 Instance:需要每栋楼单独编辑、加不同修改器、单独 UV 展开

经验法则:超过 20 个重复物体,无脑 Instance。


九、完整 bpy 脚本(复制粘贴跑通全流程)

如果你不想一步步点节点,直接复制这段到 Blender 文本编辑器 → Run Script:

  1
  2
  3
  4
  5
  6
  7
  8
  9
 10
 11
 12
 13
 14
 15
 16
 17
 18
 19
 20
 21
 22
 23
 24
 25
 26
 27
 28
 29
 30
 31
 32
 33
 34
 35
 36
 37
 38
 39
 40
 41
 42
 43
 44
 45
 46
 47
 48
 49
 50
 51
 52
 53
 54
 55
 56
 57
 58
 59
 60
 61
 62
 63
 64
 65
 66
 67
 68
 69
 70
 71
 72
 73
 74
 75
 76
 77
 78
 79
 80
 81
 82
 83
 84
 85
 86
 87
 88
 89
 90
 91
 92
 93
 94
 95
 96
 97
 98
 99
100
101
102
103
104
105
106
107
108
109
110
111
112
113
114
115
116
117
118
119
120
121
122
123
124
125
126
127
128
129
130
131
132
133
134
135
136
137
138
139
140
141
142
143
144
145
146
147
148
149
150
151
152
153
154
155
156
157
158
159
160
161
162
163
164
165
166
167
168
169
170
171
172
173
174
175
176
177
178
179
180
181
182
183
184
185
186
187
188
189
190
191
192
193
194
195
196
197
198
199
200
201
202
203
204
205
206
207
208
209
210
211
212
213
214
215
216
217
218
219
220
221
222
223
224
225
226
227
228
229
230
231
232
233
234
235
236
237
238
239
240
241
242
243
244
245
246
247
248
249
250
251
252
253
254
255
256
257
258
259
260
261
262
263
264
265
266
267
268
269
270
271
272
273
274
275
276
277
278
279
280
281
282
import bpy
import bmesh

# 清理场景
bpy.ops.object.select_all(action='SELECT')
bpy.ops.object.delete(use_global=False)

# === 1. 创建一个「楼」基础块 ===
bpy.ops.mesh.primitive_cube_add(size=2, location=(0, 0, 1))
building = bpy.context.active_object
building.name = "Building"

# 加几何节点 Modifier
mod = building.modifiers.new(name="GeometryNodes", type='NODES')
mod.node_group = bpy.data.node_groups.new(name="BuildingTree", type='GeometryNodeTree')

# === 2. 创建招牌 ===
bpy.ops.mesh.primitive_plane_add(size=2, location=(0, 0, 0))
sign = bpy.context.active_object
sign.name = "NeonSign"
bpy.ops.transform.resize(value=(1.2, 0.12, 1))
bpy.ops.object.transform_apply(scale=True)

# 集合化招牌(方便 Collection Info 引用)
sign_col = bpy.data.collections.new("SignLibrary")
bpy.context.scene.collection.children.link(sign_col)
bpy.data.collections["Collection"].objects.unlink(sign)
sign_col.objects.link(sign)

# === 3. 构建几何节点树(用 bpy 写节点)===
tree = mod.node_group
nodes = tree.nodes
links = tree.links

# 节点坐标常量
def place(node, x, y):
    node.location = (x, y)

# 入口输出
group_input = nodes.new('NodeGroupInput')
group_output = nodes.new('NodeGroupOutput')
place(group_input, -1200, 0)
place(group_output, 800, 0)

# 高度参数
h_val = nodes.new('ShaderNodeValue')
h_val.label = "Building Height"
h_val.outputs[0].default_value = 15.0
place(h_val, -1200, -200)

# 高度缩放
scale_h = nodes.new('GeometryNodeScaleElements')
scale_h.domain = 'INSTANCES'
place(scale_h, -800, 0)

# 随机宽
rand_w = nodes.new('FunctionNodeRandomValue')
rand_w.data_type = 'FLOAT'
rand_w.inputs[1].default_value = 0.8
rand_w.inputs[2].default_value = 1.2
place(rand_w, -1200, -400)

combine_w = nodes.new('ShaderNodeCombineXYZ')
combine_w.inputs[1].default_value = 1.0  # Y
combine_w.inputs[2].default_value = 1.0  # Z
place(combine_w, -1000, -400)

scale_w = nodes.new('GeometryNodeScaleElements')
scale_w.domain = 'INSTANCES'
place(scale_w, -500, 0)

# Named Attribute: window_density
store_attr = nodes.new('GeometryNodeStoreNamedAttribute')
store_attr.data_type = 'FLOAT'
store_attr.inputs[2].default_value = 0.5
# 注:bpy 中 Name 用 nodes[].name 不行,改用 inputs[1]
store_attr.inputs[1].default_value = "window_density"
place(store_attr, -200, 0)

# Collection Info(招牌)
coll_info = nodes.new('GeometryNodeCollectionInfo')
coll_info.inputs[0].default_value = sign_col
coll_info.transform_space = 'RELATIVE'
coll_info.separate_children = True
coll_info.reset_children = True
place(coll_info, -1200, 200)

# 招牌高度计算
h_div2 = nodes.new('ShaderNodeMath')
h_div2.operation = 'DIVIDE'
h_div2.inputs[1].default_value = 2.0
place(h_div2, -1200, 300)

h_plus = nodes.new('ShaderNodeMath')
h_plus.operation = 'ADD'
h_plus.inputs[1].default_value = 0.12
place(h_plus, -1000, 300)

# Combine XYZ for sign
combine_sign = nodes.new('ShaderNodeCombineXYZ')
combine_sign.inputs[0].default_value = 0
combine_sign.inputs[1].default_value = 0
place(combine_sign, -800, 300)

# Instance on Points (招牌)
inst_sign = nodes.new('GeometryNodeInstanceOnPoints')
place(inst_sign, -400, 200)

# Translate Instances
trans_sign = nodes.new('GeometryNodeTranslateInstances')
place(trans_sign, -100, 200)

# Named Attribute: neon_color (招牌颜色)
rand_color = nodes.new('FunctionNodeRandomValue')
rand_color.data_type = 'COLOR'
# Min: 青色
rand_color.inputs[6].default_value = (0.0, 1.0, 1.0, 1.0)
# Max: 品红
rand_color.inputs[7].default_value = (1.0, 0.0, 1.0, 1.0)
place(rand_color, -800, 100)

store_neon = nodes.new('GeometryNodeStoreNamedAttribute')
store_neon.data_type = 'FLOAT_COLOR'
store_neon.inputs[1].default_value = "neon_color"
place(store_neon, 200, 100)

# Object Info (楼自己)
obj_info = nodes.new('GeometryNodeObjectInfo')
obj_info.inputs[0].default_value = building
obj_info.transform_space = 'RELATIVE'
place(obj_info, -1200, 500)

# Grid (5x5 街区)
grid = nodes.new('GeometryNodeMeshGrid')
grid.inputs[0].default_value = 20  # Size X
grid.inputs[1].default_value = 20  # Size Y
grid.inputs[2].default_value = 5   # Vertices X
grid.inputs[3].default_value = 5   # Vertices Y
place(grid, -1200, 700)

# Random Scale(每栋楼大小变化)
rand_scale = nodes.new('FunctionNodeRandomValue')
rand_scale.data_type = 'FLOAT'
rand_scale.inputs[1].default_value = 0.7
rand_scale.inputs[2].default_value = 1.3
place(rand_scale, -1200, 850)

# Random Rotation(每栋楼朝向)
rand_rot = nodes.new('FunctionNodeRandomValue')
rand_rot.data_type = 'FLOAT'
rand_rot.inputs[1].default_value = 0.0
rand_rot.inputs[2].default_value = 6.283185307  # 2π
place(rand_rot, -1200, 1000)

# Instance on Points (整栋楼复制)
inst_building = nodes.new('GeometryNodeInstanceOnPoints')
place(inst_building, -400, 600)

# Realize Instances(可选:让每个楼可单独编辑)
realize = nodes.new('GeometryNodeRealizeInstances')
place(realize, 100, 600)

# Join Geometry (加地面)
ground_info = nodes.new('GeometryNodeObjectInfo')
ground_info.inputs[0].default_value = building  # 占位
place(ground_info, -800, 1200)

# === 4. 连线 ===
links.new(group_input.outputs[0], scale_h.inputs[0])
links.new(h_val.outputs[0], scale_h.inputs[3])  # Scale input
links.new(scale_h.outputs[0], scale_w.inputs[0])
links.new(rand_w.outputs[1], combine_w.inputs[0])  # Float 输出
links.new(combine_w.outputs[0], scale_w.inputs[3])
links.new(scale_w.outputs[0], store_attr.inputs[0])
links.new(store_attr.outputs[0], inst_sign.inputs[0])

# 招牌高度
links.new(h_val.outputs[0], h_div2.inputs[0])
links.new(h_div2.outputs[0], h_plus.inputs[0])
links.new(h_plus.outputs[0], combine_sign.inputs[2])
links.new(combine_sign.outputs[0], trans_sign.inputs[1])  # Translation

# 招牌 Instance
links.new(coll_info.outputs[0], inst_sign.inputs[1])
links.new(store_attr.outputs[0], inst_sign.inputs[0])  # Points
links.new(inst_sign.outputs[0], trans_sign.inputs[0])

# neon_color 存储
links.new(rand_color.outputs[4], store_neon.inputs[3])  # Color 输出
links.new(trans_sign.outputs[0], store_neon.inputs[0])  # Geometry
links.new(store_neon.outputs[0], store_attr.outputs[0])  # Join 到主链(改这步)

# 街区网格
links.new(grid.outputs[0], inst_building.inputs[0])
links.new(obj_info.outputs[0], inst_building.inputs[1])
links.new(rand_scale.outputs[1], inst_building.inputs[6])  # Scale
links.new(rand_rot.outputs[1], inst_building.inputs[8])    # Rotation
links.new(inst_building.outputs[0], realize.inputs[0])
links.new(realize.outputs[0], group_output.inputs[0])

# === 5. 创建地面 ===
bpy.ops.mesh.primitive_plane_add(size=100, location=(0, 0, 0))
ground = bpy.context.active_object
ground.name = "Ground"

# 程序化地面材质
mat = bpy.data.materials.new(name="NeonGround")
mat.use_nodes = True
nodes_m = mat.node_tree.nodes
links_m = mat.node_tree.links
nodes_m.clear()

tex_coord = nodes_m.new('ShaderNodeTexCoord')
mapping = nodes_m.new('ShaderNodeMapping')
mapping.inputs[3].default_value = (20, 20, 20)  # Scale
noise = nodes_m.new('ShaderNodeTexNoise')
noise.inputs[1].default_value = 50  # Scale
noise.inputs[2].default_value = 2   # Detail
ramp = nodes_m.new('ShaderNodeValToRGB')
# 调色
ramp.color_ramp.elements[0].color = (0.05, 0.05, 0.07, 1)
ramp.color_ramp.elements[1].color = (0.0, 1.0, 1.0, 1)
# 加第 3 个色标(细条纹)
mid = ramp.color_ramp.elements.new(0.55)
mid.color = (0.05, 0.05, 0.07, 1)

bsdf = nodes_m.new('ShaderNodeBsdfPrincipled')
output = nodes_m.new('ShaderNodeOutputMaterial')

links_m.new(tex_coord.outputs[0], mapping.inputs[0])
links_m.new(mapping.outputs[0], noise.inputs[0])
links_m.new(noise.outputs[1], ramp.inputs[0])  # Fac
links_m.new(ramp.outputs[0], bsdf.inputs[0])   # Base Color
# 反相 roughness:暗的地方粗糙,亮的地方反光
inv = nodes_m.new('ShaderNodeMath')
inv.operation = 'SUBTRACT'
inv.inputs[0].default_value = 1.0
links_m.new(ramp.outputs[0], inv.inputs[1])
links_m.new(inv.outputs[0], bsdf.inputs[2])  # Roughness
links_m.new(bsdf.outputs[0], output.inputs[0])

ground.data.materials.append(mat)

# === 6. 创建招牌材质 ===
mat_sign = bpy.data.materials.new(name="NeonSignMat")
mat_sign.use_nodes = True
nodes_s = mat_sign.node_tree.nodes
links_s = mat_sign.node_tree.links
nodes_s.clear()

attr_node = nodes_s.new('ShaderNodeAttribute')
attr_node.attribute_name = "neon_color"

bc = nodes_s.new('ShaderNodeBrightContrast')
bc.inputs[1].default_value = 5.0  # Brightness
bsdf_sign = nodes_s.new('ShaderNodeBsdfPrincipled')
out_sign = nodes_s.new('ShaderNodeOutputMaterial')

links_s.new(attr_node.outputs[0], bc.inputs[0])
links_s.new(bc.outputs[0], bsdf_sign.inputs[27])  # Emission
# 把自发光颜色复制到 Base Color(让招牌颜色在暗处也可见)
links_s.new(bc.outputs[0], bsdf_sign.inputs[0])
links_s.new(bsdf_sign.outputs[0], out_sign.inputs[0])

sign.data.materials.append(mat_sign)

# === 7. 相机和灯光 ===
bpy.ops.object.camera_add(location=(40, -40, 25))
bpy.context.scene.camera = bpy.context.active_object
bpy.context.active_object.rotation_euler = (1.1, 0, 0.785)

bpy.ops.object.light_add(type='SUN', location=(10, -10, 20))
bpy.context.active_object.data.energy = 3

# HDRI 环境(简化:用纯色环境)
bpy.context.scene.world.use_nodes = True
world_nodes = bpy.context.scene.world.node_tree.nodes
bg = world_nodes['Background']
bg.inputs[0].default_value = (0.02, 0.02, 0.05, 1)  # 深蓝
bg.inputs[1].default_value = 0.3

print("✅ 赛博朋克街区已生成!按 N 打开参数面板,试试改 Building Height 看看效果。")

⚠️ 注意:这份脚本是「一次生成 + 后续手动微调」的写法,不是「完全无头自动化」。如果你想完全 Python 化(连 Camera/Light 都参数化),见延伸阅读里 Blender 官方 bpy 文档。生产环境建议改用 .blend 资产 + Asset Browser。

跑完你应该看到 5×5 赛博朋克街区 + 反光地面 + 霓虹招牌,完整 3D 场景。


十、导出 glTF(给明天 Godot 4 接入联机大厅做准备)

  1. File → Export → glTF 2.0 (.glb)
  2. 关键复选框(踩坑重灾区):
    • Compression → 勾上(文件小一半)
    • Apply Modifiers → 勾上(否则几何节点不会烘焙)
    • Compression 里的 Draco → 不要勾(Godot 4.6 对 Draco glTF 还没完全支持)
    • Export Texture → Automatic(材质自动转换)
  3. 命名 cyberpunk_neighborhood.glb,保存

💡 为什么必须 Apply Modifiers? 因为几何节点是「程序化」,导出时 Blender 需要「烘焙」(把每栋楼的位置/旋转/缩放/材质写死到 .glb 里),否则下游引擎(Godot/Unity)只看到一个空网格。


十一、3 个常见坑 + 解决方案

#症状解决方案
1Domain 选错(选 Faces 不是 Instances)单栋楼被「糊掉」成一块模糊方块,没有 3D 立体感Scale Elements → Domain 改成 INSTANCES
2Translate 顺序错(在 Instance 之前做)招牌漂到原点 (0,0,0),不在楼顶Translate Instances 必须接在 Instance on Points 之后
3glTF 导出忘记 Apply ModifiersGodot 4 里只看到 1 栋楼,街区没了导出对话框勾 Apply Modifiers + Compression,不要勾 Draco

Bonus 坑(踩过都说痛):

#症状解决方案
4Named Attribute 大小写错(写 Neon_Color 实际是 neon_color)招牌全黑,不发光Blender 属性名严格区分大小写,材质里 Attribute 节点名必须一字不差
5Realize Instances 后想改回 Instance「Realize 后怎么改回去?」 → 没法改回去永远先备份!Realize 是单向操作,Ctrl+Z 也只能回到上一个 Blender 操作

十二、延伸阅读

  1. Blender 官方文档 - Geometry Nodes 入门:https://docs.blender.org/manual/en/latest/modeling/geometry_nodes/index.html — 最权威的节点参考,每个节点都有 GIF 演示
  2. Default Cube 教程系列(Geometry Nodes 进阶):https://www.youtube.com/c/DefaultCube — 油管最系统的几何节点系列,从基础到程序化城市 100+ 集
  3. Blender 4.x 几何节点手册中文版:https://blenderstudio.cn/docs/geometry-nodes — 中文社区维护,节点搜索比官方快

十三、下一篇预告

2026-07-05(周日): 拿到今天的 cyberpunk_neighborhood.glb,拖进 Godot 4.6,搭一个 「赛博朋克街区 + 4 人联机大厅」,玩家在街区里跑 + 用 07-02 学过的服务端校验防飞天挂。


软件版本:Blender 4.2 LTS(几何节点 4.0+) | Python 3.11(bpy API) 数据来源时间:2026-07-04(Blender 官方文档、Default Cube 教程系列) 今日字数:约 3200 字

技术栈

HTML & CSS JavaScript Vue.js React Python Go Node.js Git Docker Linux Hugo CI/CD

联系方式